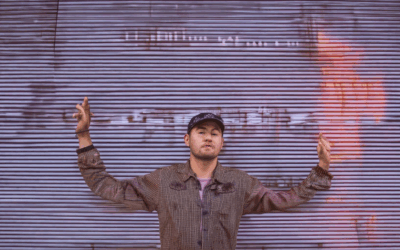
Planning a band photoshoot can be both exciting and overwhelming, as it marks a significant milestone in your musical journey. Whether you’re a seasoned performer or new to the stage, organizing a band photoshoot requires careful thought and preparation to ensure everything runs smoothly. From choosing the perfect location and coordinating outfits to capturing the right moments, this comprehensive guide will walk you through every step needed to create a memorable experience. With expert tips and actionable advice, you’ll learn how to make your band photoshoot stand out, leaving you with stunning visuals that reflect your unique style and teamwork. Let’s dive into the details and unlock the secrets to organizing a successful band photoshoot that your fans—and your future—will never forget.
Key Takeaways
– Define Purpose and Concept: Clearly outline your band’s photo shoot goals, target audience, style, and required locations to ensure alignment with your vision.
– Develop a Shooting Plan: Choose the right location, establish a timeline, create a detailed shot list, and prepare for lighting and weather challenges.
– Prepare Equipment and Talent: Ensure all gear is ready, coordinate with your subjects, assign roles to your crew, and handle legal documentation.
– Set Up the Shot Thoughtfully: Focus on composition, lighting setup, background arrangements, and staging to enhance your photos.
– Execute the Shoot Efficiently: Maintain pacing, manage the mood, have backup plans, and document the process to keep everything running smoothly.
– Review and Adjust Constantly: Assess image quality, focus, color balance, and poses to stay on track with your goals.
– Wrap Up Properly: Debrief, deliver materials, and schedule follow-ups to ensure all expectations are met.
– Post-Production Essentials: Edit images, archive files securely, and share photos as needed for maximum impact.
– Organize Photos Effectively: Sort by date, group by category, use metadata, add tags, and consider display context for easy access.
– Understand Photo Numbers: Tailor your shoot duration, subjects, and style to achieve the desired photo count, whether it’s for portrait, lifestyle, editorial, product, or wedding photography.
These key takeaways provide a roadmap for organizing a successful band photoshoot, ensuring efficiency, quality, and memorable results.
How to Make a Photo Shoot for a Band
To create an effective and memorable photo shoot for a band, follow these organized steps:
- Preparation
- Research the band’s style and aesthetic preferences.
- Choose the right equipment, including cameras, lenses, and lighting tools.
- Plan the schedule and timeline for the shoot.
- Location Setup
- Discuss the venue options with the band to ensure it matches their vibe.
- Set up lighting and props to complement the band’s look and energy.
- Ensure the area is clean and free from distractions.
- Photography Techniques
- Utilize natural light effectively, especially during performances.
- Experiment with angles and perspectives to capture dynamic shots.
- Pay attention to stage positioning for optimal coverage.
- Posing and Direction
- Guide the band members on poses and movements to highlight their personalities.
- Encourage authentic expressions and interactions during the shoot.
- Provide feedback to help the band relax and perform naturally.
- Timing and Execution
- Start shooting 30 minutes before the scheduled end time to allow for spontaneity.
- Capture various moments, including live performances and candid shots.
- Stay flexible to adapt to the band’s energy and pace.
- Post-Shoot Processing
- Edit photos to enhance color, contrast, and clarity.
- Retouch individual images to ensure consistency and quality.
- Organize and store the photos securely for future use.
- Collaboration
- Work closely with the band to ensure their vision is realized.
- Communicate effectively with all parties involved.
- Seek feedback from the band to refine the final selection.
For more tips and resources, visit our band photography guide .
How to Organize Group Photos
To ensure your group photos turn out perfectly organized and visually appealing, follow these essential steps:
- Plan the Layout: Start by sketching out the arrangement on paper or using a digital tool. Consider the number of people, the available space, and the desired composition.
- Choose the Right Location: Select a spot with good lighting, whether indoors or outdoors. Ensure the background is clean and free of distractions.
- Arrange the Subjects: Begin by placing the tallest individuals in the center or slightly off-center to create visual balance. Group smaller clusters around them for a cohesive look.
- Consider a Focal Point: Designate one person or object as the central focus to draw attention and unify the group.
- Time the Session: Schedule the photography session during golden hour for soft, natural light. Allow extra time for adjustments and multiple takes.
- Take Multiple Shots: Capture several compositions from different angles and distances to ensure variety in your final selection.
- Edit and Enhance: After capturing the photos, edit them to adjust colors, remove blemishes, and ensure the overall appearance is polished.
How Much Should I Charge for a 30-Minute Photoshoot?
Your 30-minute photoshoot cost will depend on several factors, including the type of photography, the number of people, and the level of editing required. Here’s a breakdown of what typically influences pricing:
- Photography Style: Portrait photography generally costs more than posed group shots. Events or themed sessions may also increase the rate.
- Number of Subjects: Charges often increase with more individuals, as each subject requires more time and attention.
- Editing and Outputs: Some packages include edited photos, while others charge per image. Clarify if editing is included in the rate.
- Photographer Experience: Experienced photographers typically charge higher rates compared to newer ones.
- Additional Factors: Travel expenses, specialized equipment, or unique locations may add to the cost.
For reference, mini photoshoot packages often range between $100 and $400, depending on the package and inclusions. To get an accurate quote, discuss your needs with the photographer and ask about package options available.
How to Organize a Photo Shoot
Organizing a successful photo shoot requires careful planning and attention to detail. Below is a comprehensive guide to help you execute a well-organized photo shoot.
1. Define the Purpose and Concept
Before diving into logistics, clarify the objectives of the photo shoot. Whether it’s for branding, portfolio building, or a specific campaign, knowing the purpose will guide your decisions. Consider the following:
- What is the primary goal? (e.g., promotional material, personal portfolio)
- Who is the target audience?
- What style or theme do you want to convey?
- Are there specific locations or props required?
2. Create a Shooting Plan
Develop a detailed plan that outlines the scope, timeline, and key elements. Here’s how to structure yours:
- Location: Choose a venue that aligns with the theme and provides the right backdrop. Ensure it’s accessible and complies with any safety regulations.
- Timeline: Outline the schedule, including setup, shooting, and wrap-up times. Stick to deadlines to keep things on track.
- Shot List: Prepare a list of essential shots, ensuring they align with the purpose and concept. Prioritize key images that will showcase your subject or product best.
- Lighting and Weather: Check forecasts and adjust plans accordingly. If outdoor, confirm permits and consider backup options.
3. Prepare Equipment and Talent
Ensure everyone is ready before the shoot begins. Here’s what to do:
- Equipment: Gather all necessary gear, including cameras, lenses, tripods, batteries, and storage devices. Test equipment beforehand to avoid issues.
- Talent and Models: Work closely with your subjects to ensure they understand the vision. Provide direction on clothing, poses, and expressions.
- Crew and Assistants: Assign roles and responsibilities to team members, such as lighting setup, makeup, or styling assistance.
- Legal and Documentation: Sign contracts if needed and secure releases for any photos involving people or property.
4. Set Up the Shot
Once on location, set up the scene thoughtfully. Pay attention to:
- Composition: Use leading lines, rule of thirds, and symmetry to frame your subject effectively.
- Lighting Setup: Experiment with different angles and modifiers to achieve the desired mood and atmosphere.
- Background and Props: Arrange props and backgrounds to complement the theme and enhance the visual appeal.
- Staging: Use shadows, reflectors, and other tools to minimize distractions and highlight your subject.
5. Execute the Shoot
Stay focused and communicate clearly during the shoot. Keep the following in mind:
- Pacing: Allow enough time for each shot without rushing. Practice efficiency to maximize productivity.
- Mood Management: Monitor the environment to ensure it matches the intended vibe. Adjust as needed to keep subjects comfortable and engaged.
- Backup Plans: Have alternative setups or poses ready in case something doesn’t work out as planned.
- Documentation: Capture behind-the-scenes moments and key setup details for future reference or social media.
6. Review and Adjust
After each segment, review the shots taken. Make adjustments as needed to stay on track toward achieving your goals. Key areas to assess include:
- Quality and focus
- Color balance and lighting
- Poses and expressions
- Compliance with the shot list
7. Wrap Up
Conclude the shoot by wrapping up equipment, thanking talent, and ensuring all deliverables are collected. Final steps include:
- Debriefing: Share feedback and discuss any last-minute changes.
- Delivery: Handover all agreed-upon materials, such as high-res images and edited versions.
- Follow-Up: Schedule any necessary post-shoot meetings or reviews and address any open tasks.
8. Post-Production
After the shoot, focus on organizing and editing the content. Key tasks include:
- Editing: Retouch images, remove flaws, and apply effects as needed.
- Archiving: Backup all files securely to avoid loss and ensure accessibility.
- Delivering Files: Transfer completed works to clients or stakeholders via secure methods.
- Sharing: Publish photos online or in print, depending on the project requirements.
By following these steps, you’ll organize a photo shoot that is efficient, effective, and aligned with your goals. Remember to always adapt and learn from each experience to continuously improve your workflow.
How to Arrange Photos in Order
To arrange photos in order, consider the following organized approach:
- Sort by Date:** Begin by sorting your photos chronologically. This method works well for capturing events in sequence, such as a wedding or birthday celebration.
- Group by Category:** Create albums or folders based on themes or events. For instance, separate family photos, vacation memories, and professional shots into distinct groups.
- Use Metadata:** Assign meaningful names to your files. Names like “Beach Vacation 2023” or “John’s Graduation” make it easy to identify and locate photos quickly.
- Add Tags:** Use tagging systems to categorize photos further. Tags like “family,” “travel,” or “holiday” can enhance organization and facilitate quick retrieval.
- Consider Display Context:** If printing photos for display, plan the layout to ensure visual balance and coherence, whether arranging them in a frame or around a room.
- Backup Your Work:** Regularly save your photo organization efforts to external storage devices to prevent loss of important memories.
By following these steps, you can efficiently arrange photos in an orderly manner, making it easier to enjoy and share your memories.
How Many Photos Should Be in a Photoshoot?
The number of photos taken during a photoshoot depends on several factors, including the duration of the shoot, the number of subjects, the style of photography, and the purpose of the shoot. Here’s a breakdown of common scenarios:
Portrait Photography
- Full-Day Session : Typically yields 100-150 photos.
- Half-Day Session : Usually produces 60-90 photos.
- Mini Session : Often results in 30-50 photos, ideal for quick turns.
Lifestyle Photography
- Lifestyle Shoot : Can capture 200+ photos, focusing on candid moments and posed shots.
Editorial and Fashion Photography
- Editorial Shoot : May result in 500+ photos, often used for magazines or high-end campaigns.
- Fashion Shoot : Typically produces 300-400 photos, emphasizing detail and composition.
Product Photography
- Product Shot : Usually involves 50-80 photos, focusing on product details and angles.
Wedding Photography
- Wedding Day Coverage : Captures approximately 400-600 photos, covering the entire event.
Factors Influencing the Number of Photos
- Duration : Longer shoots allow for more frames.
- Subjects : More individuals mean more photos.
- Style : Artistic styles may require more takes.
Conclusion
The number of photos in a photoshoot varies widely based on these factors. Planning ahead and discussing expectations with your photographer ensures you get the desired outcome.


0 Comments